Creating an OAuth Client App
Overview
This guide will walk you through the process of creating an OAuth client application and implementing the authorization flow with NGnair Payments.
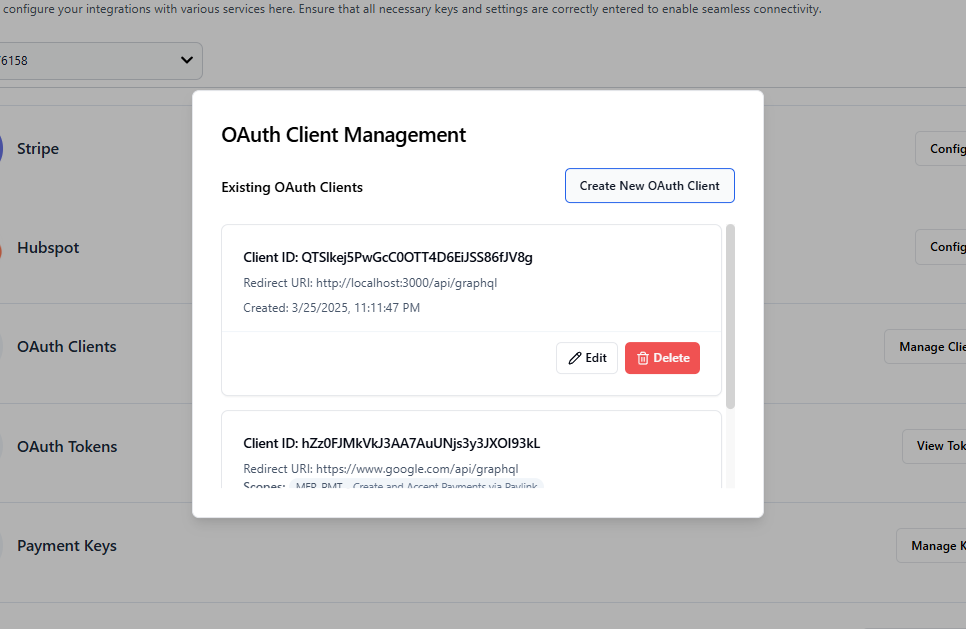
Creating an OAuth Client
- Create a normal NGnair account if you haven't already
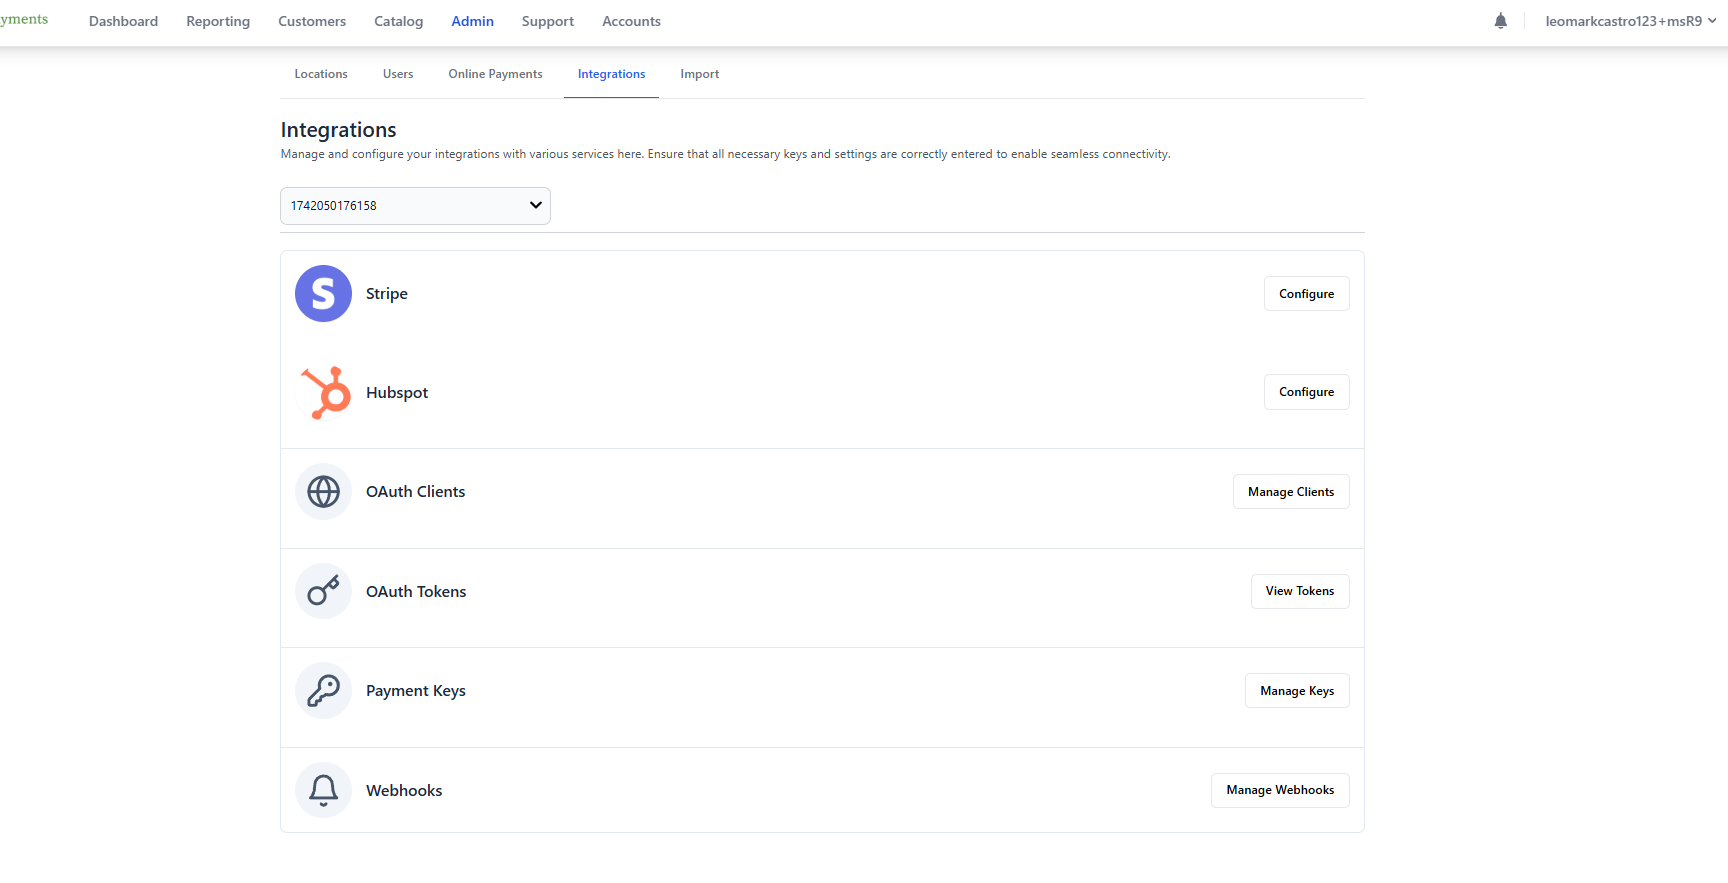
- Navigate to Admin > Integrations in your dashboard
- Click on "Create OAuth Client"
- In the OAuth client creation form:
- Enter your redirect URI (e.g.,
http://localhost:3000/api/oauth/callbackfor local development) - Select the permissions (scopes) you need for your application
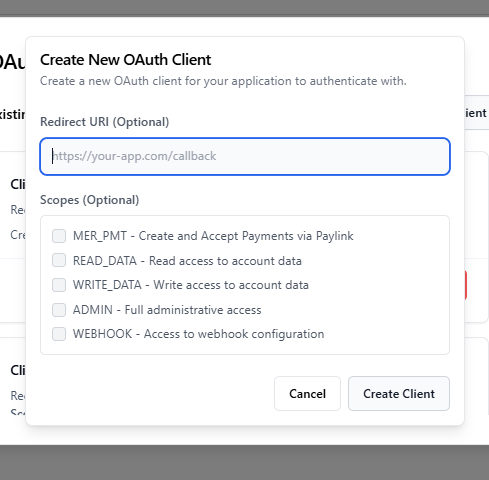
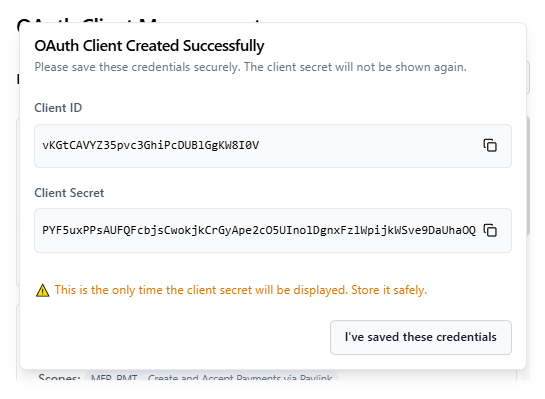
- Save the client ID and client secret securely
- Enter your redirect URI (e.g.,
Authorization Request
To initiate the OAuth flow, redirect users to the authorization URL with the following pattern:
https://demo.ngnair.com/oauth?client_id=YOUR_CLIENT_ID&redirect_uri=YOUR_REDIRECT_URI&state=YOUR_STATE
For production/live server, use https://app.ngnair.com as the root URL instead of demo.ngnair.com.
URL Components
client_id: Your OAuth client ID (e.g.,QTSlkej5PwGcC0OTT4D6EiJSS86fJV8g)redirect_uri: The URL where users will be redirected after authorization (must match the one registered in your OAuth client)state: A random string to prevent CSRF attacks (e.g.,123)
Example:
https://demo.ngnair.com/oauth?client_id=QTSlkej5PwGcC0OTT4D6EiJSS86fJV8g&redirect_uri=http%3A%2F%2Flocalhost%3A3000%2Fapi%2Fgraphql&state=123
Authorization Page
When users visit the authorization URL, they'll see the following screens:
-
Initial authorization request page
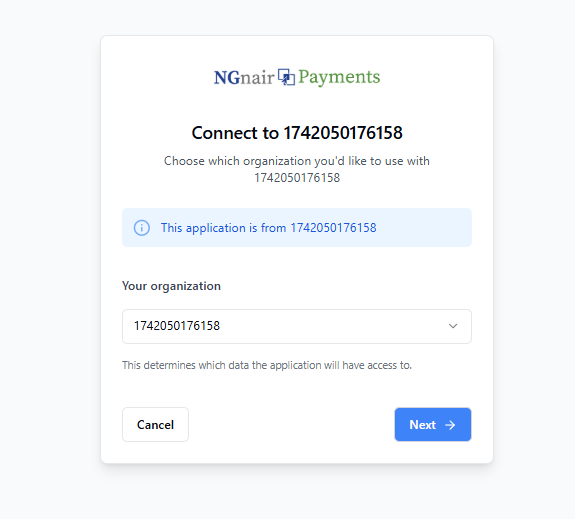
-
Permission selection screen
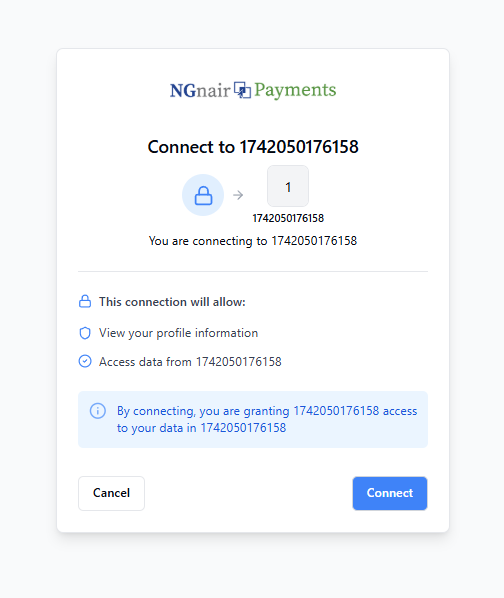
-
Success confirmation
Claiming the Authorization Code
After successful authorization, the user will be redirected to your specified redirect URI with the authorization code as a query parameter:
http://localhost:3000/api/oauth/callback?code=YOUR_AUTHORIZATION_CODE&state=YOUR_STATE
Exchanging Code for Tokens
To exchange the authorization code for access and refresh tokens, make a POST request to the token endpoint:
curl -X 'POST' \
  'https://demo-be.ngnair.com/api/oauth/token' \
  -H 'accept: */*' \
  -H 'Content-Type: application/json' \
  -d '{
  "grant_type": "authorization_code",
  "code": "YOUR_AUTHORIZATION_CODE",
  "redirect_uri": "YOUR_REDIRECT_URI",
  "client_id": "YOUR_CLIENT_ID",
  "client_secret": "YOUR_CLIENT_SECRET"
}'
For production/live server, use https://api.ngnair.com as the base URL instead of demo-be.ngnair.com.
Successful Response
{
  "access_token": "YOUR_ACCESS_TOKEN",
  "token_type": "Bearer",
  "expires_in": 3600,
  "refresh_token": "YOUR_REFRESH_TOKEN",
  "scope": "YOUR_GRANTED_SCOPES"
}
The response includes:
access_token: Use this token for API requeststoken_type: Always "Bearer" for this implementationexpires_in: Token validity period in seconds (3600 = 1 hour)refresh_token: Use this to obtain new access tokens when they expirescope: The permissions granted to your application
Store the refresh token securely as it can be used to obtain new access tokens without requiring user interaction.
Refreshing Access Tokens
When your access token expires, you can obtain a new one using the refresh token. Make a POST request to the token endpoint with the refresh token grant type:
curl -X 'POST' \
  'https://demo-be.ngnair.com/api/oauth/token' \
  -H 'accept: */*' \
  -H 'Content-Type: application/json' \
  -d '{
  "grant_type": "refresh_token",
  "client_id": "YOUR_CLIENT_ID",
  "client_secret": "YOUR_CLIENT_SECRET",
  "refresh_token": "YOUR_REFRESH_TOKEN"
}'
Important: The refresh token changes every time it is used. Always save the new refresh token returned in the response.
Successful Response
{
  "access_token": "NEW_ACCESS_TOKEN",
  "token_type": "Bearer",
  "expires_in": 3600,
  "refresh_token": "NEW_REFRESH_TOKEN",
  "scope": "YOUR_GRANTED_SCOPES"
}
Implement a token refresh mechanism that:
- Automatically refreshes the token before it expires
- Updates your stored refresh token with the new one from each refresh response
- Retries failed API calls with the new access token